
EXPLORATION
Laser Engraving Tests on Fabric
As we began to work more with various textiles, we began to test various materials for their receptivity to laser marking and cutting. Like the 3D printed materials we’ve previously experimented with, we wanted to know if we could use a laser engraver to etch durable designs into the surface of fabric.
(For this project, we’re also trying out an ideaCam S1 Pro, provided to us by BenQ. It’s got some unique features we were eager to try out. We’ll touch on them a bit in the video exploration.)
Reference files can be found in the Materials Reference accordion at the bottom of the page
We Tried the 2W IR Laser First
And it didn’t go quite how we expected
For this exercise, we initially tried using the 2 watt IR laser. We had some previous success in using this low-powered (but fine-focused) laser to apply detailed marks and designs on various types of 3D printed materials. One of our goals was to see if there was a setting we could find that could effectively mark the material without significant reduction to its strength or integrity.
But, this time, it proved ineffective on most of the textile materials we were experimenting with. So we moved to using the 10W (watt) blue diode laser.
We Switched to the 10W Blue Diode Laser
And we started to get some results
We set the xTool F1 to the score setting. This allowed us to focus on power to speed ratios without having to worry about line frequency as a variable yet. And initially we started with a pretty broad range of both speed and power settings.
And since many of the materials did not cleanly cut all the way through on the first pass (with the 10W blue diode laser set 100 mm/s at full power) we also set up a burn file to test how many passes it would take to cut through completely.
Black Nylon Canvas
On the black canvas, it's clear that the 10W blue diode laser needs to be run pretty slow, at around 100 millimeters per second, to have a significant effect. You can faintly see some light marking happening at speeds faster than 100 mm/s, but these are very difficult to see unless you are in ideal conditions.
But you can also see that spanning the power spectrum at 100 mm/s, it goes very quickly from visibly scoring the material, to cutting, to burning and melting it.
Multiple passes at full power and at 100 mm/s, results in increasing the width of the burn area — and reduction in the sharpness of any corners.
Olive Ripstop Ballistic Nylon
We found that the ripstop ballistic nylon predictably tended to melt. Lower power/faster speed settings visibly scored the material (made more apparent by holding it up to the light), but didn’t seem to weaken the material enough to cause it to tear where the scoring was.
When set high enough and slow enough to immediately cut, the material tended not only to melt but also to smoke and scorch.
At full power and 100 mm/s, the 10W blue diode laser cuts almost all the way through.
Though note that multiple passes at full power will begin to scorch the material.
Fabric-backed Cork
Out of this sample set, the fabric-backed cork seemed to respond best to the laser. The lines stayed sharp even with multiple passes at full power, and the cork resisted scorching.
Since a lot of cork-based materials that are available are a combination of cork and another substrate, it’s important to remember that those two materials will have their own properties and will likely respond differently as the laser makes contact with each of them.
It did take multiple passes to actually cut fully through it, but the cuts stayed crisp and didn’t expand wider than the contact area, even after multiple passes.
Even the thin lattice of material that remained between cuts retained some notable strength.
Dark Blue Denim
The denim showed visible light markings at the higher end of the power spectrum. Suitable enough to use the laser to apply a design to the material without compromising the integrity of the fabric. Though it should be noted that sharpness of that design can vary greatly depending on the qualities of the specific denim material.
Cutting through the material resulted in some fraying, and any parts less than 1 to 2 mm left between cuts didn’t stay together. This would make sense, as the friction in the weave is likely one of the major factors keeping the fibers together.
Looking closer at the surface, we can see that the faster speed and lower power settings result in a light mark, closer to white. As the speed is slowed and the power is increased, the markings get yellower.
We suspect that in the former, microscopic ablation of the dyed surface was occuring, revealing the white undyed layer of the cotton threads. In the latter, with more power applied for longer duration, actual burning of the cotton was starting to take place.
front
back
Nylon Webbing Strap
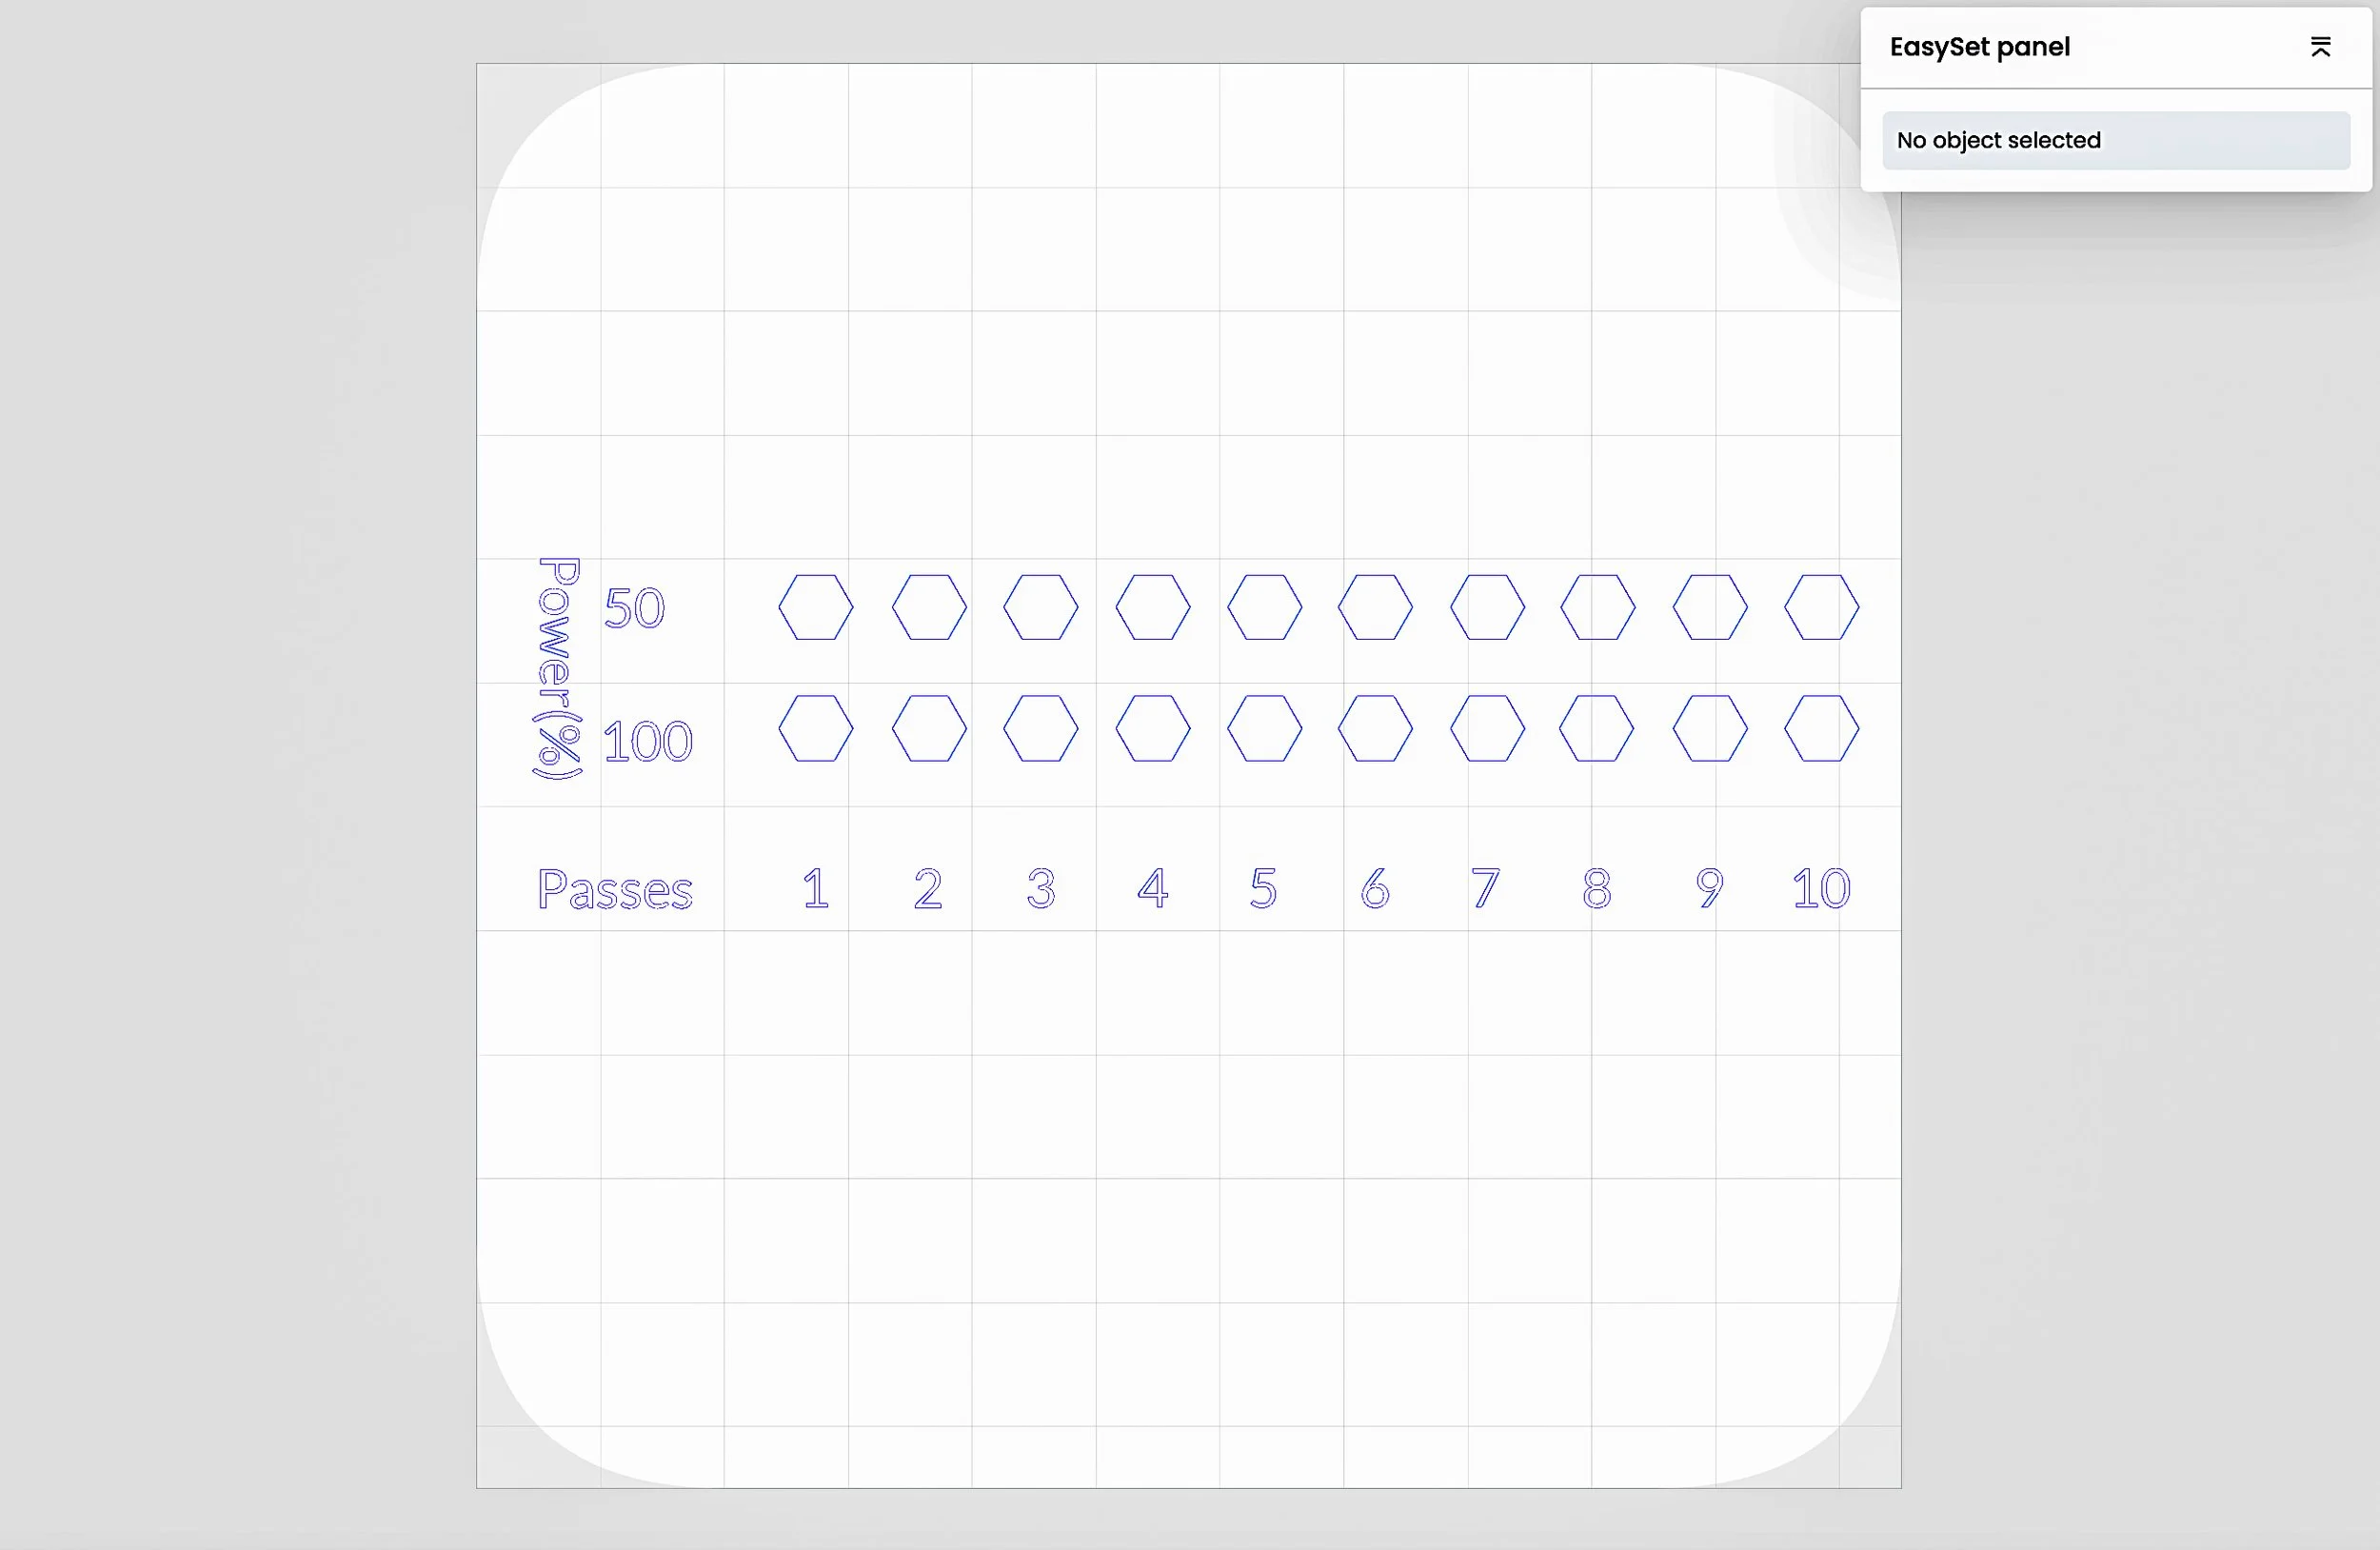
We were also able to do some testing on nylon webbing strap. We did set up a new engraver file that incorporated what we had already learned regarding the viable setting window for similar material, and also reconfigured the test design so that it would better fit into the proportions of the strap material.
In this file, we limited the power setting variables to just 50% and 100%, but we also did more testing around the number of passes; ranging from a single pass to 10 passes. We kept speed at 100 millimeters per second.
Any slower, and we suspected that the chances of excess melting and/or a flame igniting would be much higher.
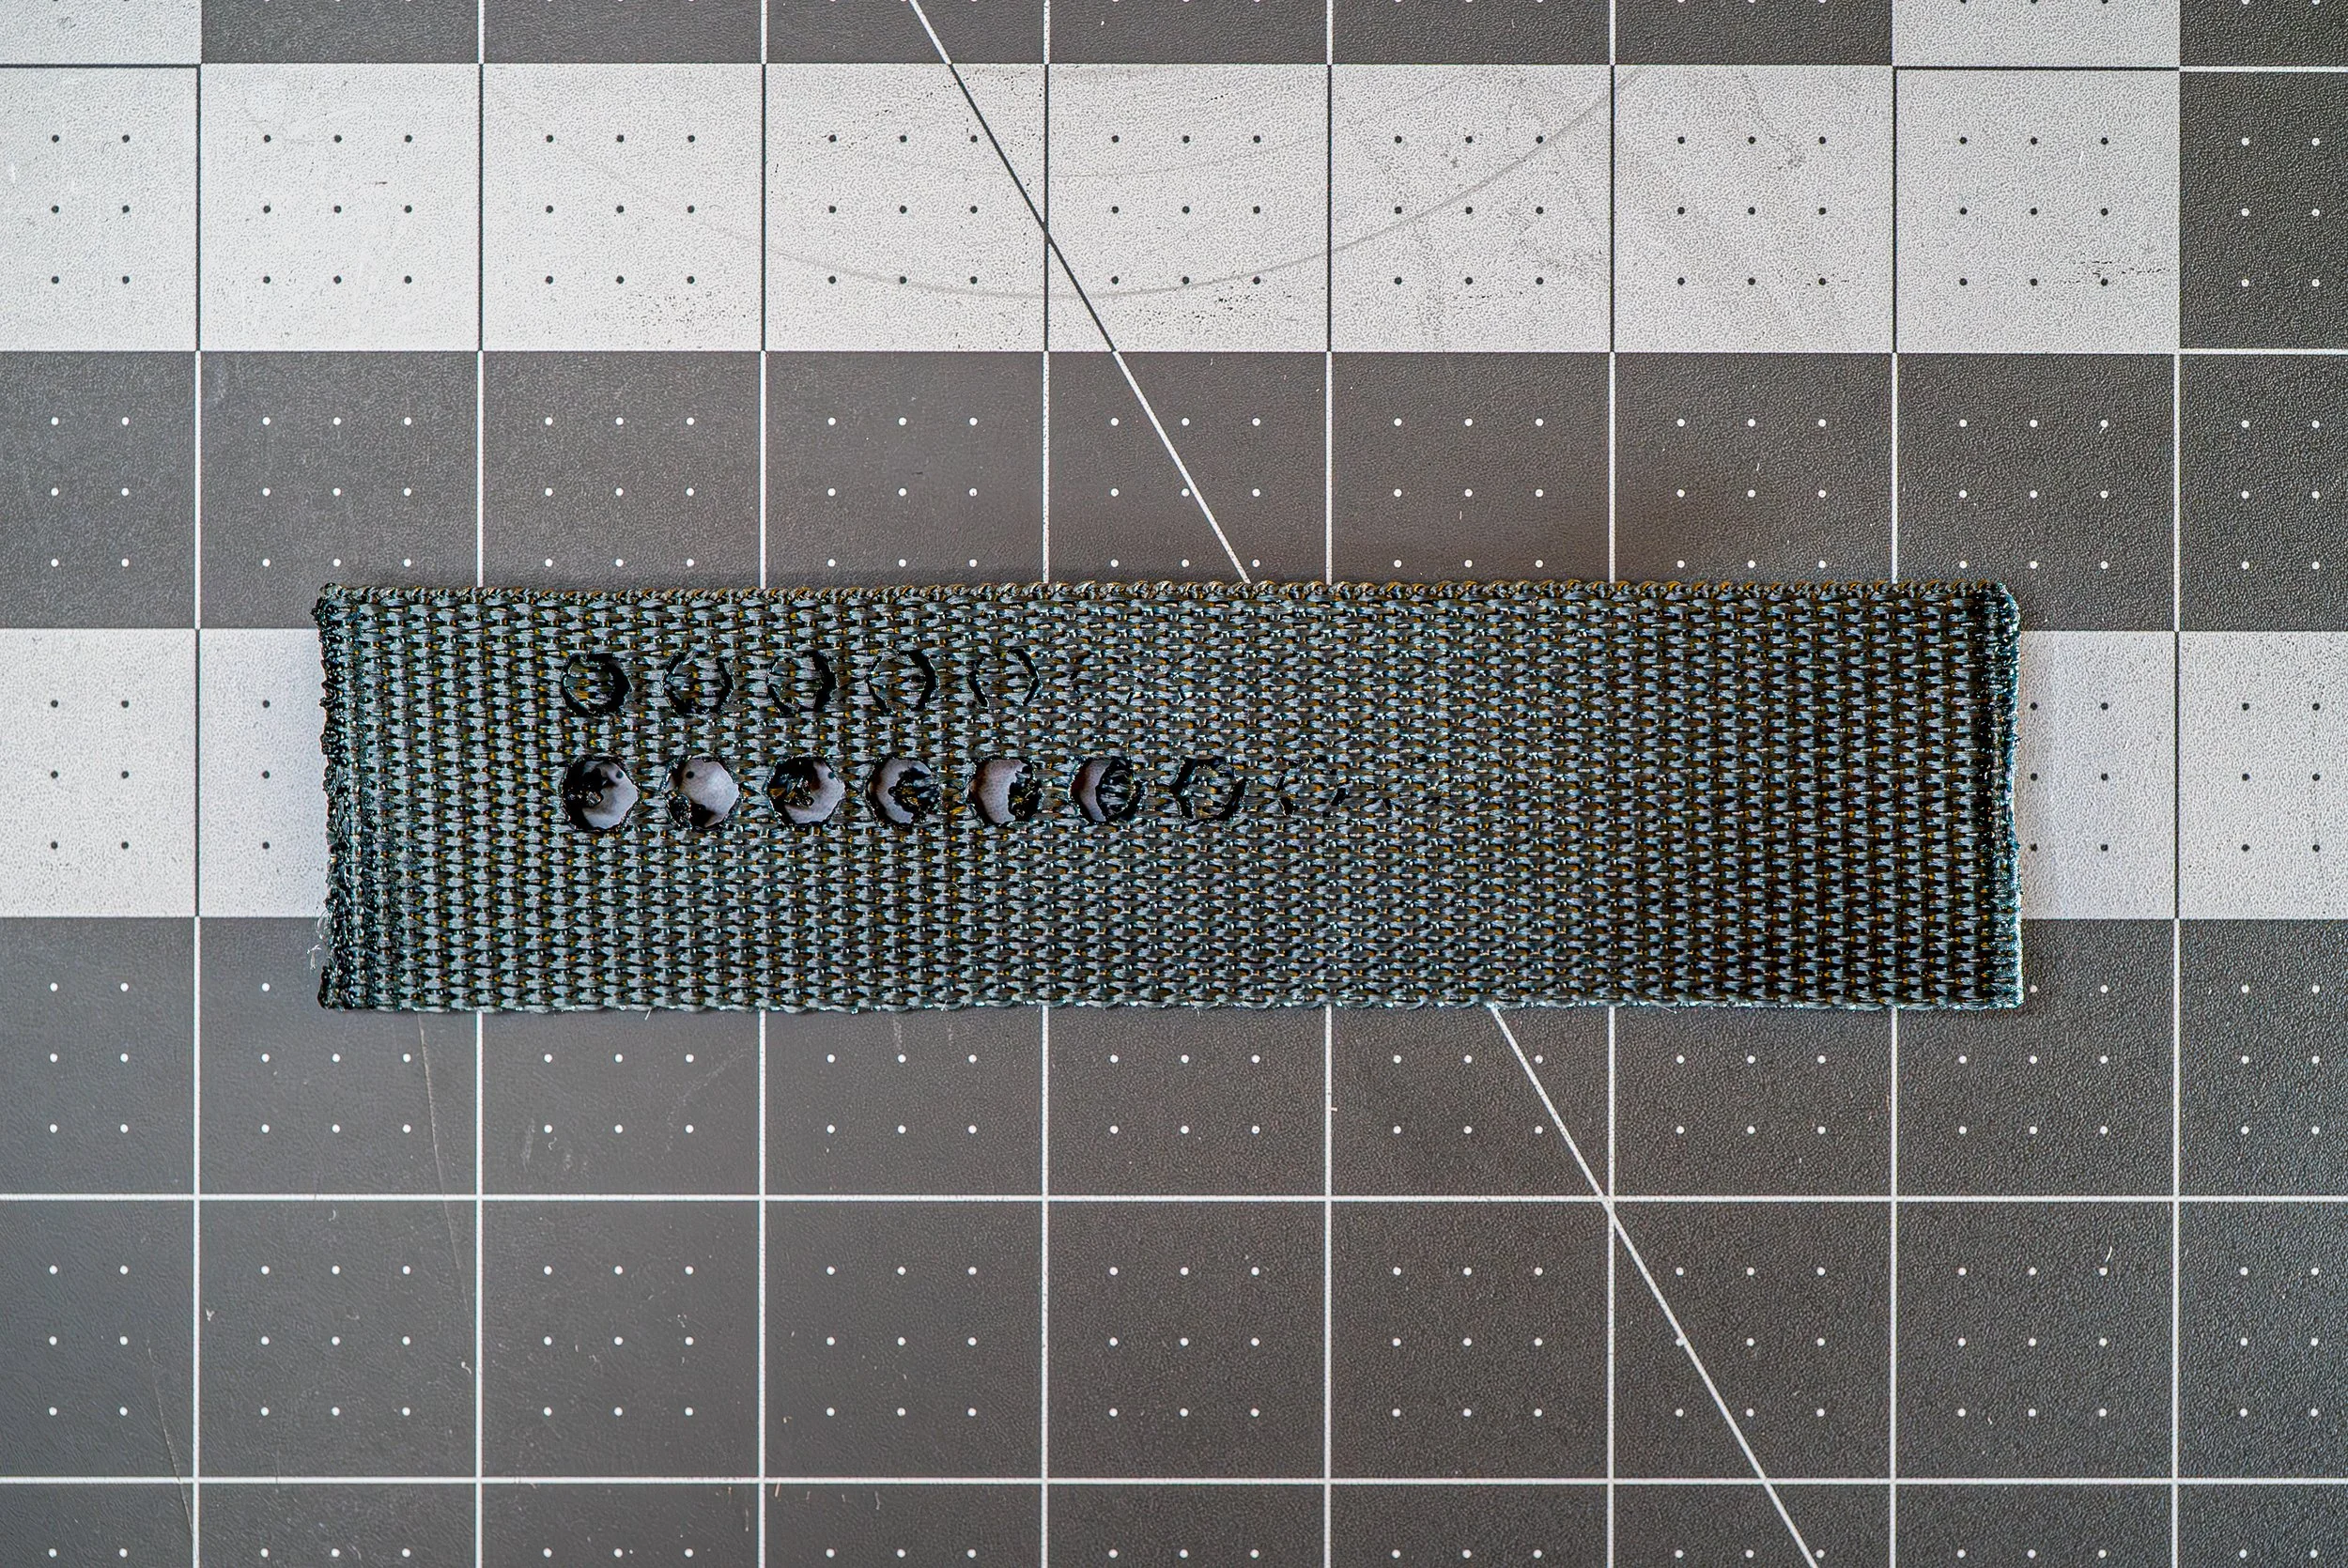
Looking at the results, we found some interesting things. The nylon webbing was the thickest material in our testing set, so we were pretty sure we’d need more passes to cut all the way through it. And yes, a minimum of 6 passes was needed to get all the way through at the speed setting we were using.
And for some reason, the portions of material we intended to cut away always seemed to remain attached to the edges of the holes we were cutting.
But the main discovery was that more passes at lower power yielded much more accurate results, with sharper, crisper corners.
Power Value is Relative to Total Wattage
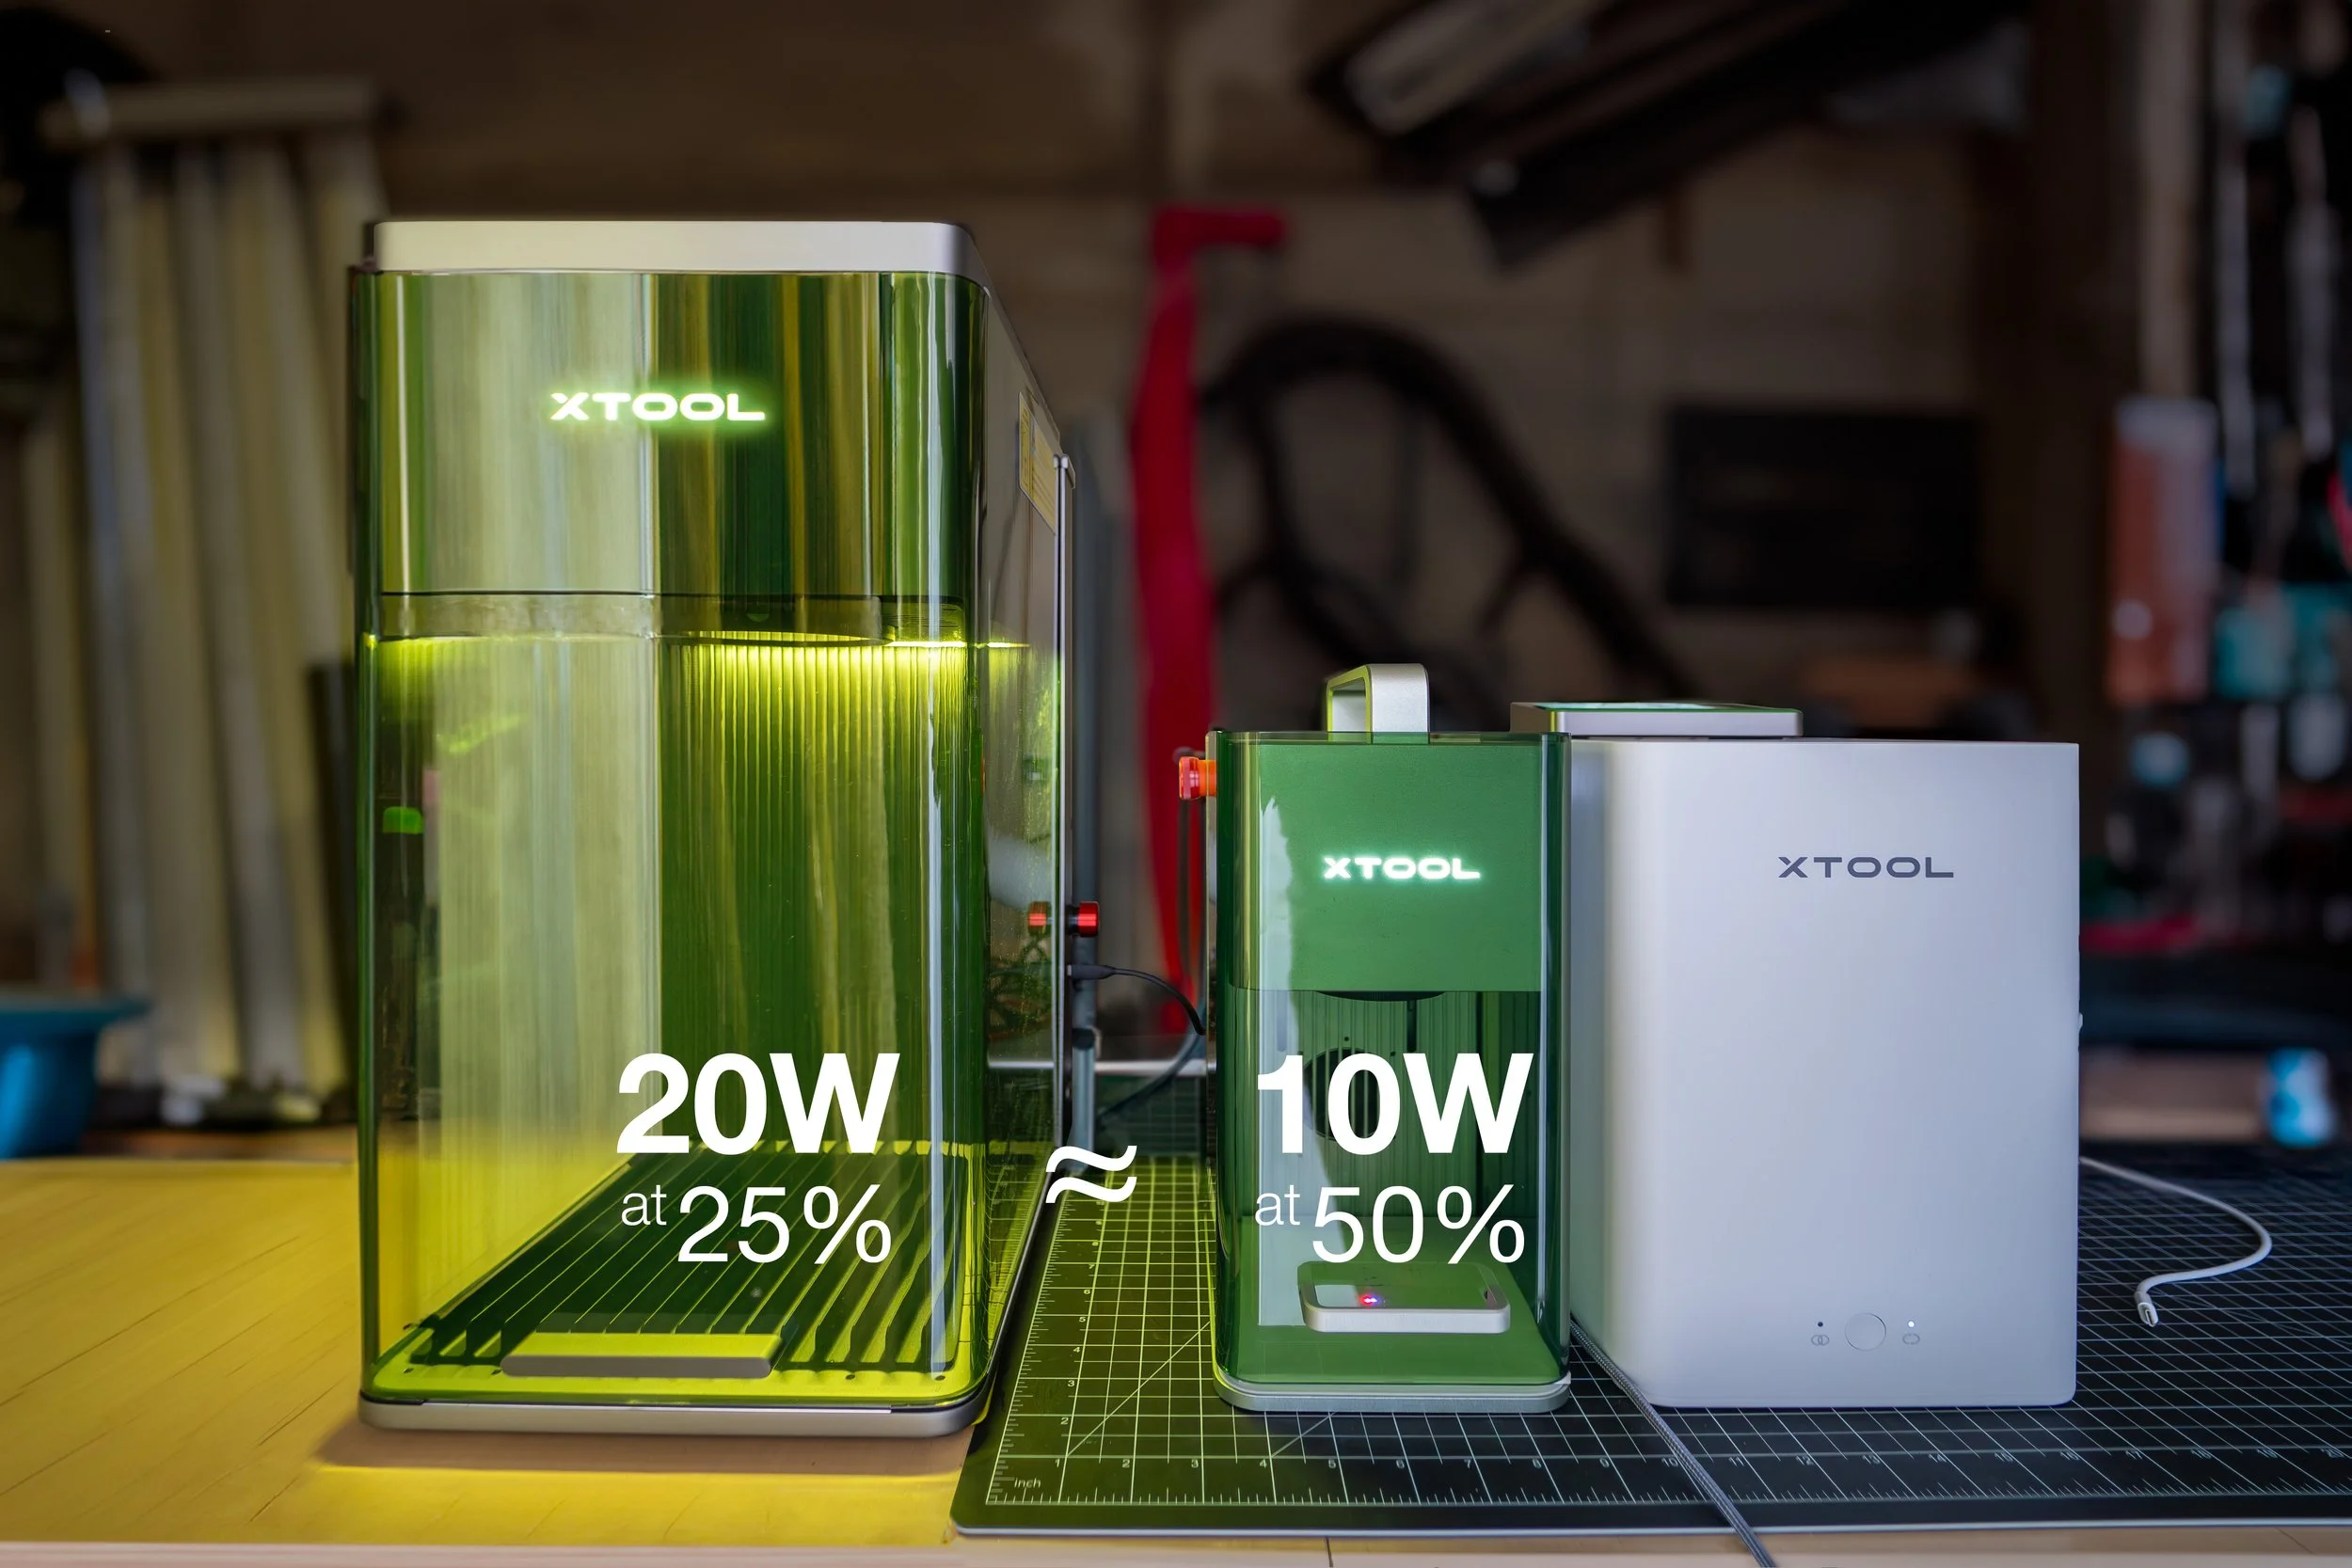
Remember that the total power rating of a laser module must always be factored-in when power percentage values are considered. The more powerful the laser, the more actual power output for any given percentage value.
For instance; a 20W laser set at 25% power would be roughly equivalent to a 10W laser set at 50% power.
Then We Applied Some of What We Learned
Denim
20W Blue Diode (xTool F1 Ultra)
Score
Power 25%
Speed 100 mm/s
Pass 1
Denim
Engrave
20W Blue Diode (xTool F1 Ultra)
Power 25%
Speed 1000 mm/s
Pass 1
Lines per cm 200
Bi-directional
Cork
Engrave
20W Blue Diode (xTool F1 Ultra)
Power 20%
Speed 1500 mm/s
Pass 1
Lines per cm 240
Bi-directional
Cork
Score
20W Blue Diode (xTool F1 Ultra)
Power 50%
Speed 200 mm/s
Pass 1
Dopp Bag
Canvas with scored cork handle
Magnetic Parts Trays
3D printed PLA Pro with embedded magnets and scored and engraved cork pads
-
If you are interested in what we used for this process, you can find our materials below.
Hardware:
Bambu X1 Carbon
WhamBam 258 x 258 Flexi Plate with Pre-Installed PEX Build Surface
xTool F1
xTool F1 UltraSoftware:
Shapr3D Version 5.692.0 (7363)
Bambu Studio 1.9.3.50xTool Creative Space v2.0.117-beta
Materials:
Grey PLA Pro
Fabric-backed cork
Denim
Ripstop Nylon
Nylon Canvas -
-
*Please remember that using lasers on synthetic materials always runs the risk of putting harmful chemicals into the air. So, before beginning, don't forget to ensure that you have proper ventilation and to use hoods and air filtration whenever possible.


